With the CLI
Requirements
- You have a running Oakestra setup.
- You can access the APIs at
<IP_OF_CLUSTER_ORCHESTRATOR>:10000
The oak-cli
Benefits of oak-cli
- Easy installation via
pip - Native interface for the Oakestra APIs
- Eliminates the need to use external third-party tools
- Accelerated & simpler workflows
- Removes the need to memorize necessary API endpoints
- The CLI commands can be chained together and used in custom scripts
- Automates tedious tasks away (e.g. acquiring login token)
CLI Setup
You can install the CLI via pip install oak-cli.
Helpful tip!
You may need to setup a Python virtual environment first to avoid conflicts with other Python packages.
python3 -m venv venv

source ~/.venv/bin/activate
Execute oak and you will be welcomed into the Oakestra CLI world 🌎

Configurating the CLI
The oak-cli supports different scenarios based on the concrete Oakestra use case and user preferences.
This CLI initially hides many of its commands to avoid overwhelming new users. Additionally, not every user needs every available command, and not every command makes sense in every situation or environment.
To configure the set of shown commands run oak configuration local-machine-purpose.
FYI - Using Command Shortcuts
Most oak commands have aliases that enable shorter commands and easier combinations, thus faster workflows.
E.g. Instead of typing out oak configuration local-machine-purpose.
Simply run oak c l.
The available aliases are shown directly in the -h output.
The CLI will ask you a set of questions about your intended use and your target environment. Based on your Yes/No responses it will provide you with the matching set of commands.
This configuration is persistently stored on your machine.
Configuring your oak-cli is optional yet highly recommended.
You can always revert your configuration to its initial state.
For further information about the CLI configuration see the CLI Configuration Manuals.
Basic CLI Usage
The root command for the CLI is oak
Need Help?
Every oak CLI command comes with its own help text to support your understanding.
Simply add --help or -h to any command to find out more.
Working with Application SLAs
As detailed in the API Approach Oakestra apps and services are defined in SLAs.
The oak-cli comes with a set of pre-defined default SLAs.
All available SLAs can be inspected via the oak application sla command.
All SLAs are stored in your home directory in the oak_cli folder.
It gets automatically created when you install the CLI.
~/oak_cli
├── ...
└── SLAs
    ├── blank_app_without_services.json
    ├── default_app_with_services.json
    └── mysla.json
To modify or add new custom SLAs just modify the content of your ~/oak_cli/SLAs folder.
E.g. The mysla.json is a custom SLA that we added after installing the CLI.
Managing Applications
Now that you are familiar with the SLAs we can start creating applications based on them.
Run oak application show (oak a s) to see the currently orchestrated applications.
The oak application create (oak a c) command asks you what SLA should be used as the blueprint for the new application and creates that app for you.
Delete one or all currently running apps via oak application delete (oak a d).
Deploying Services
The services of our applications are not yet deployed.
To deploy instances of these services we need to know the service IDs.
The IDs are visible when running oak service show (oak s s).
Click on your desired Service ID value in the Service ID column and copy it via Ctrl+C.
To deploy a new instance run oak service deploy <YOUR_SERVICE_ID>.
You can undeploy all instances of a service or only specific ones by providing the appropriate command option:oak service undeploy --service-id <YOUR_SERVICE_ID> / --instance-id <INSTANCE_ID>.
Combine Create & Deploy
You can create an application and automatically deploy its services by providing the -d (for deploy) flag to the oak app create (-d) command.
Advanced Observation Features
You can display apps and services with different levels of verbosity/detail and automatically refresh the display to stay in the know about the latest changes.
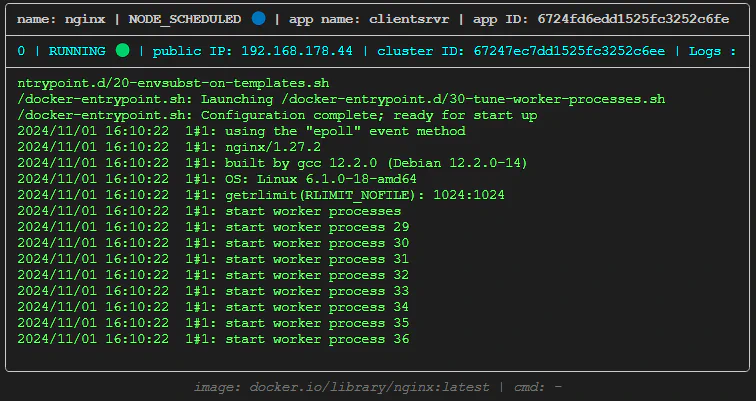
 You can even display and automatically follow the latest service logs.

For further details and recorded examples see the CLI Services Manuals.
Further Details
This page only highlights a small subset of available oak-cli capabilities.
CLI Manuals
Explore every available CLI command in detail and more
Maximize Speed & Convenience
The oak-cli is powered by Typer which supports tab autocompletion natively.
This means that you can press your tab key to either automatically complete the command you are currently typing or get a list of matching available commands. There is no need to memorize or fully type out the commands.

Simply run oak --install-completion to enable this feature.
